I have just started building a hollow wooden surfboard after seeing photos of the 'Duke' when I was younger and so many of my friends have asked me what I was doing and where I was upto that it seemed easier to throw some pics on the web with a bit of info outlining where I was up to. I hope that you enjoy looking through these pictures.
I drew out the board on a CAD program that I have on my laptop which took ages as I had to get the correct rocker shape and rib contours. I cut out a few dummy runs in card before I laser cut the real pieces from 7.5mm thick pine tongue and groove boards that I had bought from B&Q. A bit of careful gluing followed with waterproof PVA glue.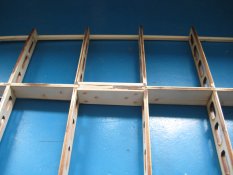
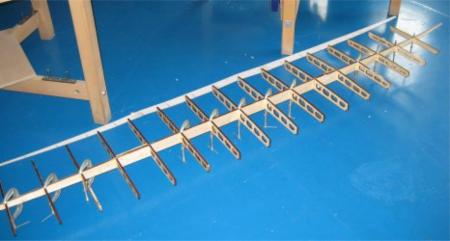
Because the board is aiming to be 9ft6 when completed I couldn't fit the whole length of the centre spar in the laser cutter and had to do it in 3 pieces. The plus side is that the laser cutter is accurate to within 0.2mm so I was able to cut some brace pieces which you can see in the left hand picture above. I put 3 dowels all the way through to keep the strength as I am avoiding using screws. In the centre photo you can see the frame glued up and with a length of 10mm square pine baton down either side of the spars. This allowed me to make sure everything was staright before attaching the deck. IN the right hand picture I have shown the adapted internals where I have inserted a bradd drain plug so that I can let any air escape that might expand and ruin the board once it is completed. You can buy pre made plugs but I fancied having a brass insert so I made one myself on the centre lathe.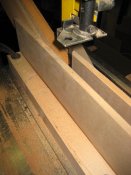
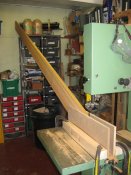
My next problem was getting wood that was thin enough to make the decks. Most timber in this counrty is poor quality when you get thinner than about 10mm so I found an architectural timber specialist in the Midlands called Vincent Timber who sorted me out with some Western Red Cedar boards that were 3.05metres long, 25mm thich and 150mm wide. I made a jig for my band saw and then cut the boards down their length so that each board of 25mm thickness became 2 boards at about 11mm thickness. It was a bit of a nightmare getting them through the saw but it did a great job and also meant thta the patterns in the wood were symetrical which allowed me to 'bookmark' the decks much the same way that you do when using veneers. I then used a thicknesser to plane the boards down to about 7.5mm thickness.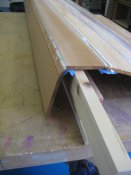
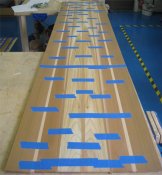
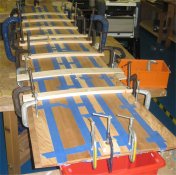
Gluing up the thin strips that I had cut was fun! messy and lots of tape used. I clamped it all to the table to keep it flat and relied on the masking tape to provide a sideways pressure while the glue dried. I used a basic PVA type waterproof wood adhesive which has always done me proud in the past.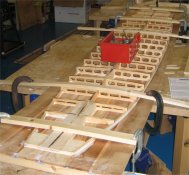
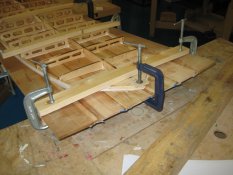
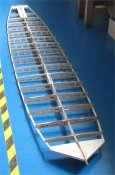
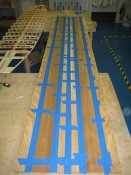
The bottom deck went on first as it has a flat cross section. I lay it in place first and drew around all the partsd so that I could apply the glue onto the deck and just plonk the frame ontop. It seemed to work really well.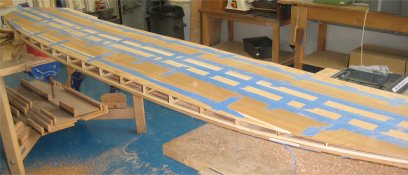
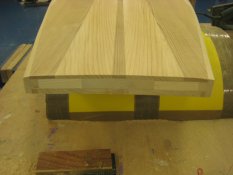
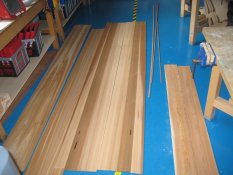
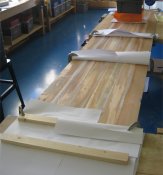
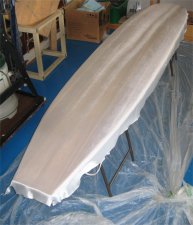
Here is the board with the top and bottom decks attached and the sides cut back to my frame. It is now ready for the side rails and nose sections to be laminated on. I know that there are loads of ways to do this but as this is my first board I went for the safest option which allowed me to shape them more which was to glue long lengths from nose to tail in stages. I have got 4 layers on either side, 3 at the tail (2 thin and one thick) and then 2 across the nose with then a full block to shape into the curved on you can see below.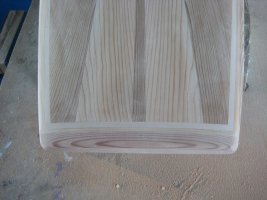
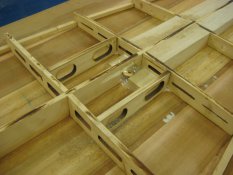
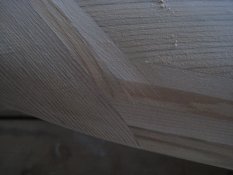 This is the corner detail near the nose.
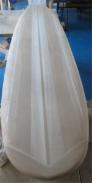
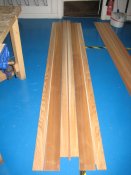
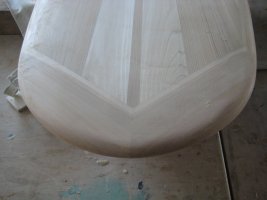
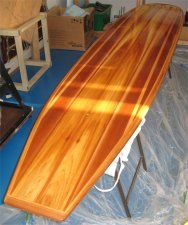
This is my finished board before I glass it. I am worried about wrecking the board so I am reading into every posible problem that I might encounter before I take the plunge. I have made a small sample piece that I can do a dummy run on too.
Glassing!
It took me a long while to get the right materials and the right advice but I finally got going on glassing several months ago. I used an epoxy slow cure called sp320 that I bought from East Coast Fibreglass in the UK. Martin is very helpful and sent all my materials over within a day or two. I have posted the photos below.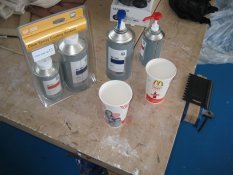
The first photo is of my epoxy resin and cups ready to mix, then it was on with the glass fibre material, then I ran a masking tape skirt around the surfboard waist line to give me somewhere to work upto and to make sure that I didn't get resin on the lower side of my board. The point when you start pouring resin on is very scary as it had taken a huge amount of work to get to the point of having a nice wooden shaoed board. There is no turning back at this point!!!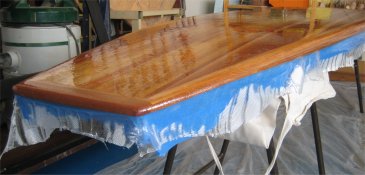
This is a slightly better close up of the resin and glass fibre with the blue bit being the masking tape. Blue masking tape is more sticky and easy to remove than the cheaper cream coloured stuff.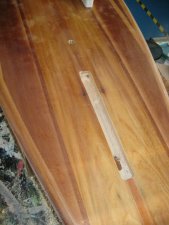
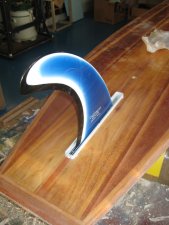
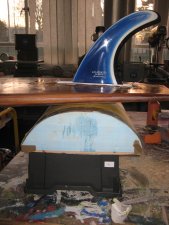
Next was the fin box poisitioning. I did a lot of reaseasrch into the distance from the tail and ended up contacting Grain surfboards in America who were amazingly helpful. (thanks Brad fopr your help and guidance) The answer that I got was that most are between 5 and a hlaf and 6 and a half inches from the tail. Also the aim of a longboard is that you can get near the nose and for this the back edge of the fin needs to stick out past the back of the board slightly. Anyway I ended up with a distance just over 6 inches and then routered a hole for the box. When you resin the fin box in it is important to have a fin in place so that you can check that the fin is completely vertical.
I am now at the point of applying a final UV coat of clear gloss varnish before I can take the board on her maiden voyage. I will upload some photos and ride feedback soon
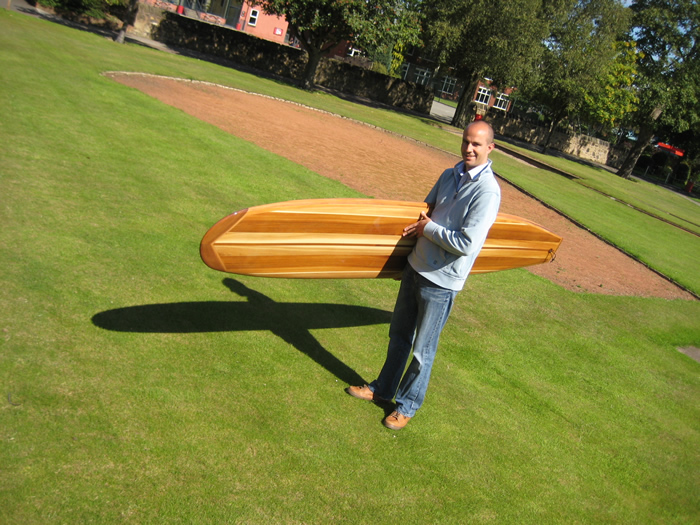
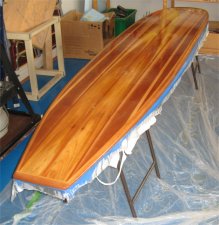
Here is the finished beast. 9 ft 6 inches of Western Red Cedar hollow surfboard. It has been a real labour of love to complete my first board and I have loved every minute of it. I am taking her to North Wales in the next few weeks for a maiden voyage so I wll pop a few photos of the day and some info on how it all went. I love the shadow in this photo, it's like the Angel of the North :)
thanks for visiting
Steve
If you are building your own board and would like some more technical help on what I did myself then please feel free to drop me an email at woodtowaves@gmail.com and I will be happy to have a chat and see if I can help.

I found this website before I started my project and bought the great book from Jack Young that gave me the valuable knowledge that I have gained to launch myself into making my longboard. I can strongly recommend Jacks book and he is one of the worlds good guys. A friend for life. If you click the link it should take you to his website.